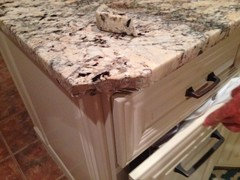
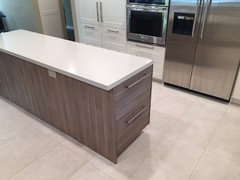
quartz countertop overhang on ikea with no knee wall
I am in a dilemma that is confusing and may require me to redesign my island layout. I read the recommendations for 15" of leg room and on the caesarstone site their guidelines stated up to 16" without support for 3cm. So I designed around that and since I didn't want to waste space I threw in a 15in cabinet on the backside of the island since i didn't need that much seating. Now I have the cabinets and the contractor and 4 countertop fabricators are saying I need supports. 1 fabricator says I can go to 15. And IKEA didn't mention anything when quoting the countertop. When I research supports there are lots of options (centerline brackets) but they all seem to require a knee wall. If I install a knee wall I loose 4" of leg room from the 2x4s which defeats the purpose. I am actually having plumbing in the current island removed in order to reclaim the 4" currently lost to framing around the plumbing venting. So do I;
- Go with the options that will install 15" even though they are the minority.
- Believe the majority and redesign / return cabinets to go to a 12" overhang.
- Find a magical hidden support that somehow doesn't require a knee wall AND works with IKEA cabinets.
Unfortunately I don't think the countertop fabricators here are that familiar with IKEA cabinets.

Commentaires (70)

michael saggau
il y a 7 ansAha! That makes sense. Thanks very much for the explanation. I'm starting the cabinet build tomorrow.
michael saggau
il y a 7 ansPeter, how did you attach the 1 x 3 (that the Hidden Island support is attached to) to the inside of the cabinets? And to attach the cabinets to the 2 x 4 base, did you screw through the particle board bottom into the 2 x 4? Thanks.

Peter Veregge
il y a 7 ansDernière modification :il y a 7 ansFor the 1x3, I screwed the first one through the sides of the cabinet and into the 1x3, using two screws per side. On the last cabinet, the screws are underneath the cover panel on the end. I installed the cover panel before I put the Island Support System on because I had to notch the cabinet and cover panel on the end, and I wanted to notch it all at once (I used a multitool for the rough cutout and finished with a router). But you could wait and notch the cover panel separately, as I did with the long back cover panel.
On the next cabinet, I staggered the 1x3 to put it back slightly so I could get one screw into the side, which you can see in one of the photos. (if they were lined up exactly, you would have to put the screw in at a pretty severe angle). For the second screw, I had to use a small L bracket under the 1x3.
I suppose you could use L brackets in lieu of screwing through the cabinets. I can't recall exactly what I used, but I think it might have been these, 1.5 inch brackets, or maybe the smaller 3/4 inch ones.

The structural connection for the 1x3--both on the cabinet and the support--is not super critical because it only holds the support in place, so the little L bracket is enough. Once there is a countertop on the support, the countertop holds it in place, very little strain is on the 1x3. Instead, the strain is on the lever point at the rear of the cabinet where you installed the 2x6 or 2x8 (for the Hidden Island support, you could use a 2x4 back there, I just wanted to be able to put more screws into it)
For the base, I screwed through the bottom of the cabinet (particle board) into the 2x4's. Since I was using drawers, none of the screws will show, so used a lot, like 8-10 per cabinet. I think I used a combination of #8 and #10 screws, probably 2.5-inch or 3-inch. I used more on the front, because any leverage that is put on the overhang will act on those screws.
 PRO
PROJoseph Corlett, LLC
il y a 7 ansIt takes a lot of work to properly cantilever tops and Peter's done a fine job. Nice to see for a change.
michael saggau
il y a 7 ansPeter, thanks very much. You are saving me from a lot of head-scratching and mistake making.
Peter Veregge
il y a 7 ansOne other thing I should mention about a mistake I made, not with the cabinet construction, but the design. For wastebaskets, we used a 24-inch cabinet, and put in two 14-gallon Variera bins, which are 21 and 5/8 inches wide, so they fit perfect inside that 24-inch cabinet.
The problem is that the bins are too big. They don't fit any standard trash bags because the bin opening is so large (about 21x10). You have to use a 33 gallon trash bag. Although all that room is nice, it's unwieldy when trying to take the full bag outside.
So if I were to do this again, I'd use an 18-inch cabinet and two 10 gallon Variera bins, which I think use a kitchen-standard 13 gallon bag.
http://www.ikea.com/us/en/catalog/products/S89040842/
http://www.ikea.com/us/en/catalog/products/80263573/#/00263572

Edmund Lee
il y a 6 ansHi, a quick question: we have placed IKEA cabinets back to back and therefore have cabinet doors under the overhang. In order to be able to open them, this set up may not work. Are there any suggestions on how to work around this? I was just thinking to raise the entire height by a 1/2", using the methods stated here, with 2x8s etc so that the opening of the doors are unhindered. But that would mean basically adding them to each cabinet, and also likely interfere with some cabinet drawers on the other side. Great info here by the way!
 PRO
PROBeth H. :
il y a 6 ansEdmund, you should start your own thread, but I'll see If I can give you a quick answer. build up the granite substrate (the plywood) by a 1/2" and then have your granite edge made longer, to hide the height difference. You shouldn't have to raise it too much.

- PRO
Joseph Corlett, LLC
il y a 6 ansEdmund Lee:
I'd suggest a 2 cm top with a 2cm edge build-up or a solid surface top, so you can support the top with square tube inconspicuously. Edmund Lee
il y a 6 ansHi Beth, thanks for the reply! That's quite a chip from that granite, yikes!
I apologize for not following, I was probably not explaining it clearly, but just to clarify, I'm also needing to install brackets/braces to support an overhang that runs over cab doors, preferably cantilevered given our constrictions. So something needs to both raise them and serve as an anchor so the doors can be opened. The substrate would be on top of that, so I'm not following I'm afraid. Maybe I misunderstood? Because IKEA cabs are frameless, the fronts are open, and there's nothing anchor or inset. Even with a 2x4 replacing the stock steel bar that at the front, it is flush with the cab top and so my question is how to use brackets in this case? Where it is reversed, beginning at the back and overhanging the front of the cabs, where the door tops are also flush with the cab tops... below is a photo from another thread of a similar set up to ours, they asked the same question but there didn't seem to be any advice. The info in this thread is nearly the solution, but just the opposite direction, so I was hoping someone had a suggestion! Again, I apologize if I didn't understand your reply. Thanks!

- PRO
Beth H. :
il y a 6 ansJoseph, perhaps you could offer a more detailed explanation since this is your forte?? thx
- PRO
Joseph Corlett, LLC
il y a 6 ansScrew (4) 1" aluminum square tubes to the pictured cabinet sides/tops that cantilever. Drop a top over the tubes that cover them.
Edmund Lee
il y a 6 ansHi Joseph: I'm not sure that I understand, how does one screw the tubes to the sides/tops of the cabs, (without cutting into them to make them flush with the top of the cabs)? Because that's my dilemma here, I need to be able to still open the doors... do you mean the outside of the outer cabs? And then have a longer edge? And drop a 2cm substrate ("top") to cover? Or screwing them vertically down, like into 2x4s that are mounted flush with the cab tops on the inside of the cab walls? I apologize, I know you don't have to offer advice etc and it takes time, which I appreciate, I'm afraid I don't follow where the tubes are placed... thanks!
Peter Veregge
il y a 6 ansI think Joseph means to attach the tubes to the top of the cabinet sides. That will raise the top an inch and give you clearance. The only issue is that the height may not match your counter in other parts of the room. Or you will have to raise all the counters by an inch.
I would try to avoid using 2x4 at that cabinet front, that will impair the use of the cabinet, and not look very good. Everything that I did was not visible once the drawers were in. But if that does not matter to you, then I guess you could do that and use either of the brackets I used, with lumber replacing both the front and back stock IKEA brackets.
I was thinking you could also use the T-brace (order it long on one side and support with a 2x4 or 2x6 in the back of the cabinet) or the Sidewall Hidden support bracket. But for both you have to figure some way to replace the existing front cabinet bracket, unless you went over the top of it. https://originalgranitebracket.com/collections/all But both of those are more complicated than Joseph's solution.
Peter Veregge
il y a 6 ansDernière modification :il y a 6 ansAnd on the subject of counter height and needing clearance, for IKEA counters you either use 3cm without any thicker edge return (edge build-up), or 2cm underlain by plywood and an edge return that just clears the drawers/doors for the cabinets, but they may have to use some spacers between the plywood and the stone (what I did). You just lay the stone or the plywood right on top of the IKEA metal brackets and it should clear.
Your countertop pro will manage the clearance, that's what they do. (no way should anybody do a stone/quartz countertop as a DIY, that's a terrible idea)
So either way, you should have clearance on both sides for drawers/doors.
Edmund Lee
il y a 6 ansHi Peter, Thanks for the fulsome explanations, it's all good advice. I'll think about everything you and Joseph suggested and talk to my fabricator (granite) to figure it out, they're not used to dealing with IKEA cabs so it's a bit of a learning curve for everyone. The granite is 3cm. I appreciate everyone's replies, thank you very much!!!

Paul n
il y a 6 ansHi Peter, thanks for the very helpful write up.
I’m a little confused as to how you added the 2x8 flat against the back of your
second cabinet (cabinet in between) when you need to go through the same spot
in the cabinet where you just mounted the 2x6 for cabinet 1. How did you put
the top screws in at an angle? Do you have a picture of this? Would you
recommend going with an L bracket to hold up the 2x8? Any advice would be much appreciated. Thank you!Peter Veregge
il y a 6 ansDernière modification :il y a 6 ansPaul,
Sorry this is a bit late. If you look at this linked photo, on the right you will see an arrow in pencil, which just happens to point to the top of a gold color screw. That screw is angled toward the 2x8 in the next cabinet. There are probably a couple more underneath that silver bracket.
Here is another photo, at the top left you can see two screws adjacent to the 2x6, which angle into the 2x8 in the next cabinet.

I think I threw a couple screws in back side as well, at an angle, but since that side has the slot, there is more cabinet wall "meat" on the inside. I was using GRK R4 or SPAX T-STAR PLUS FLAT HEAD screws, #9 or #10, 2.5 or 3 inch (probably 3 inch, since the double cabinet walls are 1.5 inches and I like to sink 1.5 inches of threads into the 2x8), and you just have to figure out what angle to use to put as much of the screw as you can in the center portion of the 2x8 (not poking out on either side).
And I put at least two more screws directly under the 2x6 and into the 2x8, where no angle is needed.
With all those heavy duty screws, you should not need an L bracket under the 2x8. And if you put one in it would have to be screwed into just the cabinet walls, which are particle board. I found that putting the tip of the screw into real wood holds far better than particle board alone.
By the way, I highly recommend GRK or SPAX construction screws. They use a Torx (T Star) driver, which usually comes with the box of screws, you never need a pilot hole, they are super strong, and unlike Phillips heads, I have never stripped one. They cost a lot more than the cheap screws, but compared to the cost of your kitchen, it's not that much. And they give you peace of mind, they are not going to break.
Allison Lull
il y a 6 ansHi Edmund - curious if you ever solved your issue of the overhang over outward facing cabinets? And how you did it?
U P
il y a 6 ansPeter, thank you for all the great advice on this thread. You have a horizontal 2x8 running across the upper back of your dishwasher cavity. Did that affect the depth clearance of your dishwasher?
Peter Veregge
il y a 6 ansU P, a dishwasher usually has room behind it to run the hoses, so it does not take up the whole depth. Check your specs or measure your dishwasher to make sure, but I had plenty of room.
Because there is no cabinet there, the 2x8 only reduces the space by 1.5 inchesU P
il y a 6 ansPeter, wow, thank you for replying so long after your project was completed. That is great to know about the space. I have a hardsided undercounter icemaker in that island that is going to be a mess, I think, 23.5" front to back, if I recall. I need to go measure again....
I was thinking about how you said you had a hard time installing the horizontal 2x6s (or 2x8s). Would pocket screws have worked? I think I could hit each cabinet edge from both sides with pocket screws that would go through the first 2x8 outside the cab, the cab wall, then a little into the second 2x8 inside the cab, and do that from both sides. I have a newfound respect for my Kreg jig since my 5yo was able to use it to build his first project without my help, lol.Thank you again for sharing your expertise.
Peter Veregge
il y a 6 ansDernière modification :il y a 6 ansAs luck would have it, I was just checking Houzz after a long absence.
Pocket screws should work, although I have never used them. They might need to be a bit longer because you are starting in the lumber rather than the cabinet side. I do not know how heavy-duty those pocket screws are.
I just realized that in addition to the 1.5 inches for the 2x8, the bracket and screws consumed about another half inch, so it was probably 2 inches total. I do not recall exactly how deep the dishwasher was (Bosch), but the front of it is flush with the front face of the doors/drawers on either side of it.


As for your icemaker, you probably want the front to be flush with the door/drawers, which gives you about 3/4 inch extra beyond the cabinet. I assume the island is going to have an overhang, which is why you want to use the 2x8 to support the bracket.Peter Veregge
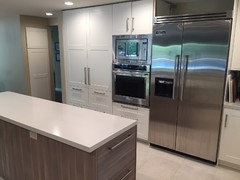
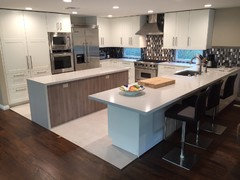
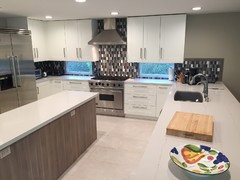
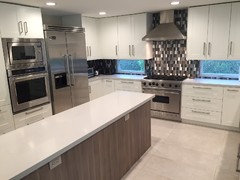
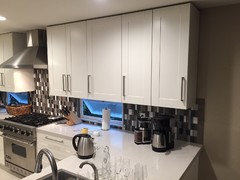
il y a 6 ansDernière modification :il y a 6 ansAs long as I'm posting, I may as well throw up some photos of the finished kitchen. l plan on putting a cabinet above the refrigerator, but I have to cut it to fit, and it's an involved project I just have not got around to.


Peter Veregge
il y a 6 ansDernière modification :il y a 6 ans
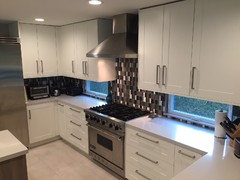
After I was "done," we decided we needed a couple more cabinets over the peninsula. You may notice that the handles are opposite each other, but that is the best way to open these, since they straddle the countertop. Here are before and after photos.

U P
il y a 6 ansPeter, your kitchen looks great! Don't worry about cutting your above-fridge cabinets to a custom size. We did a lot of custom sizes, and it is pretty easy to do. If you can keep the front a stock dimension, sourcing the doors will be easier. Or maybe the height is only about 10", so you could make solid front doors? Or open shelving? What are you planning? We used custom fronts from Scherr's so we could order fronts in any dimension. Thanks again for your help.
ingmarr
il y a 6 ansFabulous looking kitchen! And wonderful details on your project! We are in the mids of buying all the pieces for our new kitchen, with very similar challenges. All this information will be extremely useful to us.
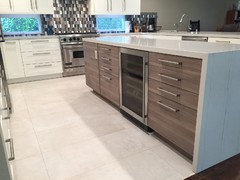
On a less structural note, may I ask what door/drawer fronts you have on your island? They look lighter than the walnut fronts we are currently considering and are wondering where you got yours from?Peter Veregge
il y a 6 ansDernière modification :il y a 6 ansU P, the kitchen is IKEA, so no custom sizes. I already cut one of the drawer fronts, just below the wall oven. If you look carefully you can see about 1.75 inches are missing from the top and bottom. The cabinet above the fridge is more complicated because I have to cut the cabinet down to fit in the slot, and then re-engineer assembling the cabinet since the holes for the connecting hardware will be cut off. It will be fine, it will just take a bit more time than I have right now.
ingmarr, the entire kitchen is IKEA. The island is Brokhult, which was apparently replaced by Voxtorp walnut, which had just been introduced when we started our kitchen. We preferred the color of the Voxtorp, but did not like the incorporated finger slot handles; we wanted hardware handles. Brokhult is more of a modern look that resembles woodgrain at first glance, it is a grey-brown "walnut effect" thermofoil, it is not wood.
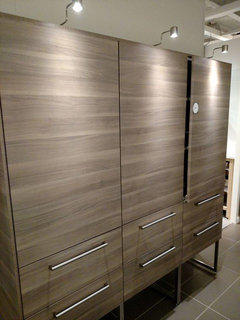
You may be able to find Brokhult on eBay or other places, I guess if we had waited a bit it would have all been on closeout at IKEA.
https://www.ebay.com/itm/Ikea-Brokhult-Kitchen-Cabinet-Doors-Drawer-Faces-Sektion-/292474117259 (this link works on one of my browsers but not Chrome, weird. Just search Brokhult on Google)ingmarr
il y a 6 ansPeter, we are also going with IKEA, but did not like the integrated handles of the Voxtorp. Looking at companies like Semihandmade and Dendradoors that specialize in making custom doors for IKEA cabinets. Some even make the grain patterns continue across adjacent panels, which is a feature we really like. Thanks for your input!
U P
il y a 6 ansingmarr, that is what we did. Our kitchen is Ikea with fronts from Scherr's. Less expensive (less modern, more traditional, either a pro or con depending on your plan) than Semihandmade. Scherr's customer service is stellar.
Peter, for your fridge cab, if you cut "up" instead of cut "down" (in other words, cut off the bottoms of the sides and back) you can keep the hanging hardware placement. You would have to redrill for the bottom camlocks. Or, you could cut "up" for the back, cut "down" for the sides, and just redrill the three holes for the hanging brackets. I had to do several, and I had a small piece of plexiglass lying around, so I drilled a template. As long as you are that 3/4" front the ceiling you can hang on the rails. If you are undecided about fronts, you could always order custom fronts for just that fridge cab, maybe with glass fronts so the difference isn't so conspicuous. Whatever you decide, your kitchen is already awesome! :)
Peter Veregge
il y a 6 ansDernière modification :il y a 6 ansThanks U P, the fridge cab will be a 40" x 15" x 15" wall cabinet, laid on its side. (IKEA horizontal cabinets are only 36" wide max). So the mounting is going to be custom, probably just long screws with fender washers into the ceiling joists. I may "sister" the ceiling joists with 2x4's for extra strength, but this cabinet is not going to hold anything really heavy.
The door will flip up, and will probably just have regular hinges since it is going to be used just occasionally. I will have to use filler pieces on each side because the fridge is 42". I already have the door, so I will just cut it down to fit with a table saw.
You may notice there is a bit of a gap between all my cabinets and the ceiling, but it is not exactly the same all the way around the kitchen. This was dictated by how much the ceiling sags as you go away from the walls. IKEA cabinets use doors (whether by IKEA, Scherr, Semihandmade, or others) that go all the way to the top of the cabinet, so you have to make sure the doors will clear the ceiling when they swing open. With 40" cabinets and 8-foot ceilings, you have to mount the cabinets really high to maintain clearance under them for your counter. With 30" cabinets you can space them 6"-8" below the ceiling and avoid all of this. (many ready-to-assemble (RTA) cabinet builders offer a 36" cabinet for this reason, but IKEA only has 30" and 40").
My ceiling sags a lot, but not evenly, it varies around the room. My cabinets are mounted at the very highest level possible, but I had to determine that by measuring the ceiling around the entire kitchen so I could mount one cabinet at the lowest ceiling point and then level all the other cabinets to that lowest cabinet. Really helps to have a laser level for that job (or better yet, have a neighbor who lets you borrow theirs!)
U P
il y a 6 ansMy dad had the same problem with his ceiling. FWIW, no one will have a clue you had to work that out because it looks awesome.
In our kitchen, we had lots of problem solving puzzle pieces. Sometimes we could switch sides and bottoms of two cabs. It occurs to me, since you have fridge depth available... could you cut down two 21" wide base cabs and avoid the filler? You don't need help, it is just fun to think about the puzzle pieces. :)
Peter Veregge
il y a 6 ansU P, if I used two 21" base cabinets (or one cut in half and joined together) I would have to get custom doors or cut a 20" door in half, then drill the mounting holes in the cut doors for the hinges, etc. That's way too much work for this cabinet. Most people don't even bother with a cabinet above a built-in fridge, they just put up a cover panel and call it a day.
Peter Veregge
il y a 6 anslgstacey, there is no reason you "can't" just put support posts going to floor, except they are ugly and get in the way. The original poster and myself were looking for a clean look without corbels or posts. I am very happy with the way my overhangs turned out.

Forrest Poirier
il y a 5 ansThank you Peter for the in-depth walkthroughs and pictures of how to beef up the IKEA cabinets. I’m in the midst of a similar project, and this has helped me tremendously!
Christina Callaway
il y a 5 ansPeter - wonderful job!! What type of built in microwave did you buy? Do you like it? I am looking at options that work with IKEA microwave cabinet and looking for any feedback. Thanks!
Peter Veregge
il y a 5 ansDernière modification :il y a 5 ansChristina, the 30” opening in the IKEA oven cabinet is huge, so I bought a huge microwave. Panasonic NN-SD975S, 2.2 cubic feet. It is actually a countertop model, but they sell a trim kit for it so you can make it look like a built-in for a lot less money than a real built-in.
The trim kit is necessary because it has venting to allow the microwave to operate without overheating. The downside is that trim kits are stupidly expensive, almost as much as the microwave itself! Shop around online (beyond Amazon) and you can sometimes find a better deal.
As far as microwaves go, this one is pretty good. It had an issue when we first got it, as the fan was not operating (the whirring noise you always hear with a microwave). I thought it was a weird microwave that had no fan noise, but in a couple weeks it started working and has had no problems since.

felizlady
il y a 5 ansI would never plan counter seating anywhere near a cooktop.
When people sit at a counter, they will always be inclined to lean on the counter, so the overhang must be supported.
I believe the measurements quoted for overhang without support just refer to self-support without the added weight of the upper third of an adult leaning upon the overhang.
If steel support platforms cannot be successfully attached to your cabinetry because it isn't real wood, you will need support for the overhang in the form of legs.Peter Veregge
il y a 5 ansDernière modification :il y a 5 ans"If steel support platforms cannot be successfully attached to your cabinetry
because it isn't real wood, you will need support for the overhang in the form of legs." felizladyMaybe you missed the long explanation above of how to attach those steel support platforms to IKEA cabinets, which do not have any wood backing, and the sides of which are made of particle board. As well as how to attach steel supports to a dishwasher space that lacks a cabinet. No legs required.
Peter Veregge
il y a 5 ansOne thing I just realized, when I said the Maximera drawer slides still fit with a 2x4 mounted at the back of the cabinet. This MAY NOT be true for cabinets that use a drawer-within-a-drawer, like the one in the photo below. Those inner drawer slides are mounted slightly deeper into the cabinet, and thus might hit the 2x4. You may have to notch to get them to fit, you will just have to check.


Stephenie Weissinger
il y a 5 ansPersonally I'd just go with 12" overhang.
We have 10" and its plenty of room. 13 should work finePeter Veregge
il y a 5 ansDernière modification :il y a 5 ansHere is a FANTASTIC guide that I used to help design my kitchen. I highly recommend it, even if you are hiring a design service, to check their measurements and layout.
http://starcraftcustombuilders.com/kitchen.design.rules.htmIt gives you code measurements, recommended measurements, and a general discussion on many design criteria.
For counter seating overhangs, it recommends the following for different counter heights:
30" (table height): 18" overhang
36" (counter height): 15" overhang
42" (bar height): 12" overhangMy counter is 36", so I went with the 15" overhang.
U P
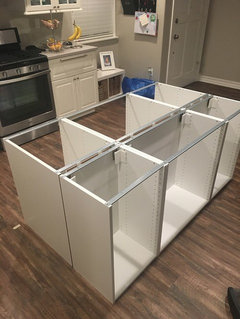
il y a 5 ansPeter, we are almost done. I'll post pictures when I am not working on the kitchen so much, lol. We ended up splitting the difference and moving our horizontal 2x8 back 3/4" because I was worried about enough depth for the dishwashers. As a result we were able to notch the backs of the cabs and use a single, continuous 2x8 support beam with vertical posts of 2x4s on the flat (instead of deep like a pony wall). I agree about not fitting drawers within drawers. We could have if we really wanted, but we were using the reinforcement of 1x3s flat to the cabinet sidewall, and the inner drawer was hitting that. It was not a problem, for us, because we had two other cabs on the perimeter which were just as good for locating our inner drawer.
That island isn't going anywhere, and the countertop guys said it was the most level set of cabs they had ever seen. Made the work worth it.
Our kitchen is only 14' wide, which is just about the limit for even having an island. We could go no deeper than 12" overhang at the 36" countertop height, but I bought some shallow "Winsome Saddle Seat Stools" that fit fine.Linda Stacey
il y a 5 ansUglier than Posts that go to the floor on an overhang (which I think are actually ok in the right setting) is a floor that is not consistent. The wood floor should continue into the kitchen. It's too chopped up. IMO
Peter Veregge
il y a 5 ansDernière modification :il y a 5 anslgstacey - In case you missed it, the original question on this thread was how to install overhangs on IKEA cabinets, without posts. I spent considerable time answering that question. It was not about flooring choices.
But now that you brought it up, I will explain my choice. We had already decided to tear up the worn out and dirty Saltillo tile in our hallways, kitchen, and breakfast room, and tear out the carpet in the living room, dining room, and family room. We wanted wood, or a wood-look tile throughout.
For weeks we went back and forth over wood vs. tile in the kitchen, or whether we should put wood-look tile throughout the house. Wood looks better. Wood feels better. I would rather stand on wood than tile any day. And having a single flooring type looks way better than two different floors, especially in our open-concept kitchen/breakfast room/family room.
So why did we choose tile for our kitchen? Unlike a lot of people in our affluent neighborhood, we rarely eat out. We use our kitchen constantly. At the time of the remodel, our boys were 11 and 13, always eating, and my wife is a stay-at-home mom. So our kitchen, and its floor, has to be durable. A neighbor, with only one kid, had his wood floor ruined in just a few years by his kid not being careful with the water/ice dispenser on the refrigerator.
If you have read any of my posts on this thread, you would know that I have an overarching design philosophy: I build things to be functional and bombproof. I like nice design, but if it is not durable, I don’t really want it. I think through all of the possible things that can go wrong, and I design for it. For example, I caulked the perimeter of the (a) bottom of the sink cabinet and trash cabinet, (b) the dishwasher and refrigerator bays, and (c) every lumber foundation for the cabinets, just in case something ever leaks, it will not ruin the lumber foundation or the cabinets. I over-engineered the cabinets to be able to use the counter overhang supports without corbels or support posts. And I have glued every single IKEA cabinet that I have ever built. My stuff does not fall apart. I was building this kitchen to last.
So after agonizing over the wood vs. tile for weeks, I was the one who chose tile—over my wife’s objection. And over the year and half we have been using this kitchen, I do not regret that choice. Teenage boys are both clumsy and sloppy, and we constantly have to mop up stuff. Tile is a worry-free floor. It may not look or feel like wood, but I never freak out if I find standing water on it. I don’t lose sleep when my now 15-year-old gets up at midnight to raid the frig, and might spill something while doing so. So it was not the prettiest choice, but it is the easiest to live with.
Peter Veregge
l'année dernièreHere is an update to this thread. I said that the 2x8 in the back of the dishwasher bay did not affect my ability to get the dishwasher installed. Well, a friend was remodeling and gave me a newer Kitchenaid dishwasher and guess what? It did not fit. Turns out my Bosch is a shallow model that just fits. Bosch makes both kinds, one that is a full 24" deep and one that is 23" and change. So I will have to consider that if I ever replace it.
- PRO
Joseph Corlett, LLC
l'année dernièreYou should consider replacing the 2x8 with 3/4" x 3/4 " blocking or angled aluminum screwed to the studs. Now any dishwasher will work.

Rechargez la page pour ne plus voir cette annonce spécifique


Patricia Colwell Consulting